 |
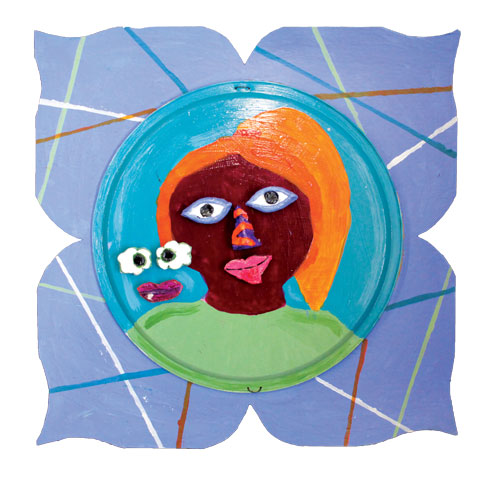
| A baking pan portrait with attachable magnetic features. |
I wanted to translate this idea into an effective lesson for seventhand eighth-grade students that incorporates critical concepts and skills.
First, I needed to find an affordable surface for the magnetic features. I purchased rectangular and round baking sheets in bulk at a dollar store website—the perfect solution. The magnetic facial features are 2D in the book, but I decided to use clay to incorporate a 3D element.
Personal Color Palettes
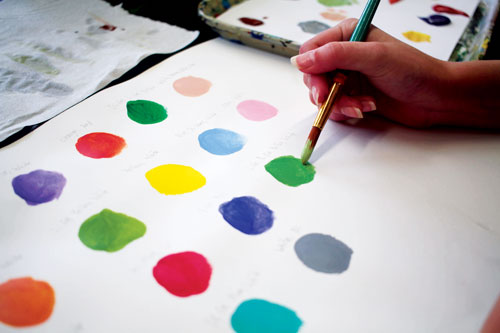
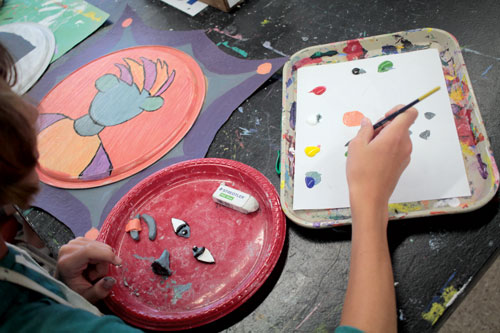
Prior to this lesson, students finished a more traditional portrait and color theory unit, which wraps up with the creation of a personal color palette. Students experiment with all colors of paint (primary, secondary, intermediate, etc.) and generate ten to twelve colors that reflect their personality.
I find that giving students the time and freedom to experiment with color results in much richer color combinations. These colors are used for their portrait, border, and facial features to create unity.
Getting Started
First, students brainstorm and sketch head shapes. I encourage them to explore a variety of exaggerated head shapes; however, they can choose to use a more traditional head shape.
Next, students transfer their final head shape to a piece of paper that is the same size as their surface. First, they trace their baking sheet on a sheet of paper to ensure the correct size. This serves as their rough draft as well as a tool to determine the size of their soon to be sculpted facial features. Students often trace their head, neck, and shoulder shapes to multiple sheets of paper to continue experimenting with color and shading. Expressive color is applied to the entire composition, including the background.
 |
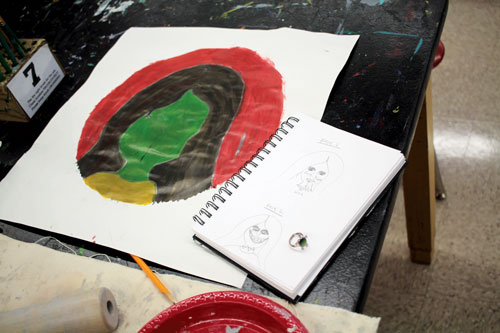 |
| Top: Personal color palettes are chosen. Bottom: Students draw and paint a rough draft of their portrait to scale. |
Facial Features
Next, students brainstorm and sketch facial features. I ask them to plan enough features for two complete faces so they can interchange them. Some students also sketch extra items such as jewelry. Once the sketches are complete, I demonstrate sculpting each facial feature from clay to review general proportion, as well as slipping and scoring.
After our review, students use clay to build their facial features. They use their sketches as a reference for size and shape.
While the clay pieces dry, students gesso the bottom of their baking sheets to prepare for painting. Once the gesso is dry, students sketch their head, neck, and shoulder shapes onto their pan. Expressive color and shading are then applied. Faces are left blank of features and the entire bottom surface is painted, including the edges. At this point, the clay pieces are dry and ready for the kiln.
Framing and Finishing
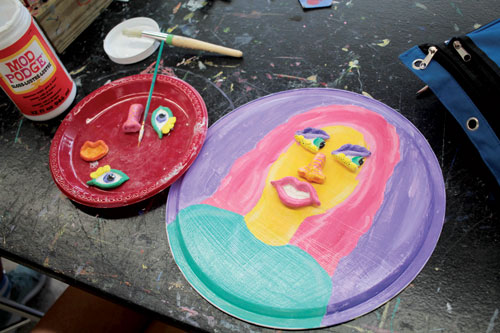
Students create a chipboard or cardboard frame for each pan. I use an 18 x 18" (46 x 46 cm) piece of 14-ply chipboard for 12" baking pans. Students begin by brainstorming frame shapes using 8 ½ x 11" (21.5 x 28 cm) pieces of copy paper to experiment with shapes. Frames are designed and painted in the same expressive style as the portraits to unify the overall design. Once clay is fired, students use acrylic paint to complete the facial features, again using expressive color. Acrylic medium is applied to completed pans and clay features. Button magnets are then hot-glued to each facial feature.
 |
 |
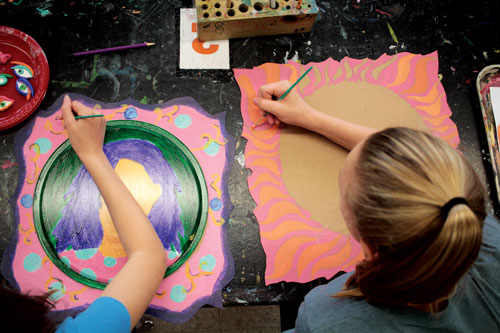 |
| Top: Fired clay features are painted with students’ color palettes. Middle: Acrylic medium is applied to completed pans and clay features. Bottom: Chipboard or cardboard frames are designed and painted with expressive color. |
Our final step is to attach the pan to the frame. Using an awl and hammer, students center the pan on the frame and punch two holes at the top and bottom of the pan. Holes are about ½" (1.25 cm) apart and go through both the pan and cardboard frame. We thread a 6" (15 cm) piece of wire through the holes and twist it in the back. We create a loop in the top wire so that the piece can be hung.
Conclusions
Students’ finished portraits are interactive magnetic works that invite the viewer to play along with their creations. The pieces generate a conversation between the artist and the viewer. I love this project because every student within my diverse group of learners is successful. It’s thrilling to see students working confidently and creating incredible work that they are truly proud of.
Melissa Speelman is an art teacher at Sycamore Jr. High in Cincinnati. Ohio. speelmanm@sycamoreschool
NATIONAL STANDARD
Creating: Generate and conceptualize new artistic ideas and work.
RESOURCE
Pick Your Nose & Make a Face: bit.ly/MakingFacesNoseBook
View this article in the digital edition.

