 |
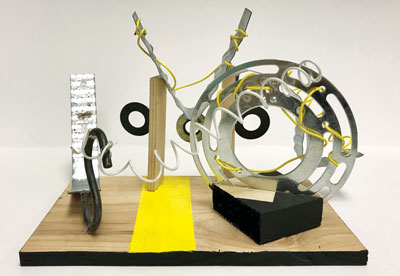
| Jess K., Slug in Motion, grade seven. |
Nothing excites middle-school students more than using hot-glue guns and materials they don’t often get to handle.
Gathering Materials
Prior to this lesson, I reached out to parents, staff, and students to collect materials. One resource that has proved to be indispensable for this lesson is the local Habitat for Humanity. I was able to secure buckets of bolts, wire, and other interesting metals at a very low price.
Procedures
I began by showing students an image of Nancy Graves’s Wheelabout (1985) for inspiration. We discussed the visual movement and harmony among her materials, emphasizing how it was constructed with various common and found objects.
Next, I introduced the materials that students could recycle into their sculptures. Students will amaze you with their creative ideas on how to manipulate materials in ways you haven’t considered.
 |
 |
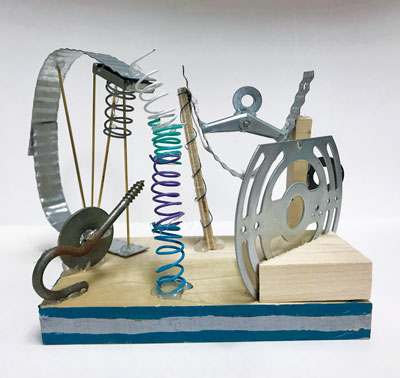
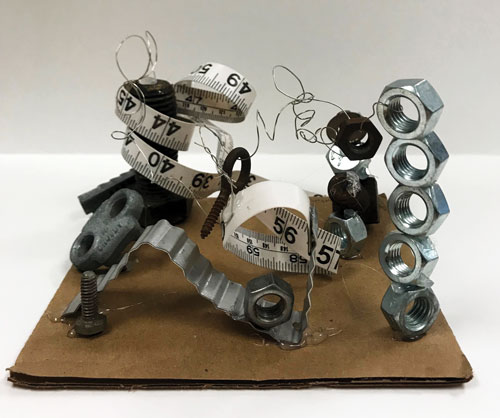
| Top: Megan F., The Looper, grade seven. Bottom: Morgan, Measurement of the Mind, grade seven. |
Students gathered a variety of materials at their workstations to provide inspiration and choice for their sculptures. I’ve found that the more materials students have at their fingertips, the more creative their solutions tend to be. Cardboard and wood scraps make sturdy foundations for sculptures, but plastic lids also have an appeal. Students began to assemble and manipulate their materials to build a construction expressing visual movement and harmony.
Assembling the Sculptures
Students used low-temperature hotglue guns to put their work together, after I reviewed how to safely use them. I also reminded them to use caution when working with their materials since some, like wood scraps, may have sharp edges. It’s sometimes easier to paint items as they are assembled, rather than when the sculpture is completed. I provided acrylic paint and allowed students to decide what, if anything, gets a coat of paint.
After the sculptures were complete, we displayed them. They proved to be a source of conversation and engagement for students and adults alike.
Final Thoughts
There are numerous aspects of this lesson that offer individuality and inspiration, making it a great opportunity for critique. Some students had a plan they followed for their design; others were simply moved in the moment. It was fascinating to hear their personal accounts of the journey they took to arrive at the final sculpture. The excitement that spreads across students’ faces as they catch sight of their classmates’ and their own finished sculptures never ceases to amaze me.
Kimberly Stamm is an art teacher at Gerald Huesken Middle School in Lancaster, Pennsylvania. kimberly_stamm@conestogavalley.org
N AT ION A L S TA N DA RD
Creating: Generate and conceptualize new artistic ideas and work.
WEB L I N K
Nancy Graves: nancygravesfoundation.org
View this article in the digital edition.


