This assignment allowed students to experiment with an art technique that most of them had never tried before. I’ve never heard my classroom so quiet as everyone focused on creating their delicate quilling designs. Many students continued to make designs at home, inspired by the new skill they had learned. It was great to engage and challenge them with something new and expose them to the beautiful process of “painting with paper.”
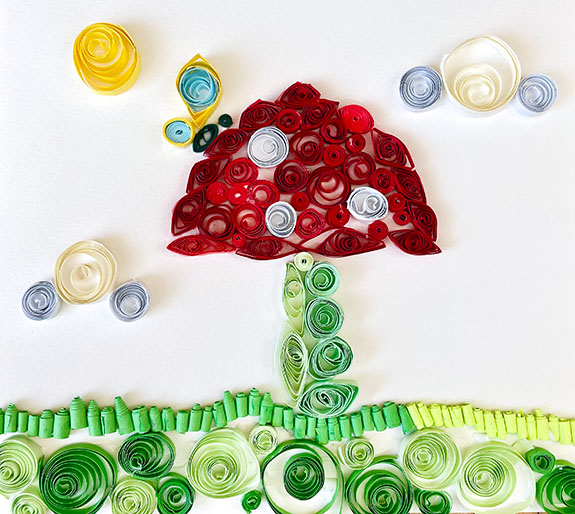
Paper quilling is the process of cutting paper into long, thin strips, rolling and pinching the strips into different shapes, and gluing the shapes together to create eye-catching designs with intricate details. Paper quilling can be used to decorate cards, boxes, gift bags, picture frames, and can even be used to create 3D standalone art pieces.
I’ve attended several workshops on quilling over the years during both the National Art Education Association and Virginia Art Education Association conventions. Every year I say I’m going to try this process with my students, but it never happened until this year. When I first attended the workshops, I was intimidated by these elaborate designs, and I wondered if my students would feel the same way. Because I knew that my gifted artists are always up for a challenge, I decided to embed paper quilling into my curriculum for this school year, and I wasn’t disappointed.
Introducing Paper Quilling
I was researching quilling artists, looking for inspiration when I discovered Yulia Brodskaya and her beautiful, whimsical pieces. Her work immediately caught my attention, and I knew it would interest my students.
After discussing Brodskaya’s work and viewing examples of other quilling designs, we watched videos demonstrating paper quilling techniques. Then I gave students time with a few pieces of paper to practice the techniques using a quilling tool or small stylus stick.
Planning and Sketching
Students created thumbnail sketches of ideas for their own compositions, researching and developing several designs. I asked them to focus on the subject matter as well as a background that might complement the overall design. During a mid-critique, students received suggestions from their peers and refined their ideas as needed.
Let the Quilling Commence
I gave students a substrate on which to mount their designs. We used cold-press textured watercolor paper mounted on foam core for display.
I had bins of colored paper organized by color family for students to choose from. Some strips of paper were pre-cut from the manufacturer, while others I cut myself. I also had a paper cutter with a safety guard, which students could use to cut their own pieces. Students stored their pieces in zip-top bags.
There were a variety of quilling tools for students to experiment with, including pencils, straws, bamboo skewers, toothpicks, bobby pins, and actual quilling tools. Each tool worked in its own unique way to manipulate the paper.
Students used tacky glue and a foam brush to apply the glue before applying their quilled paper.
Learning from Each Other
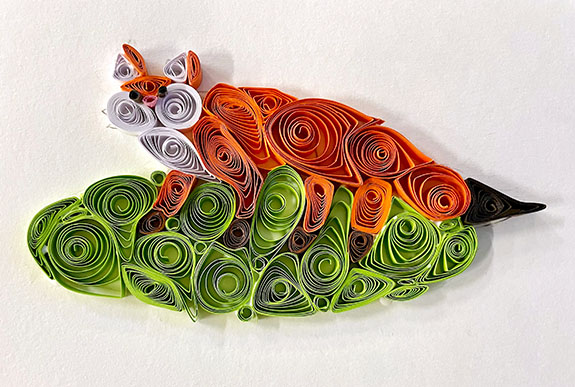
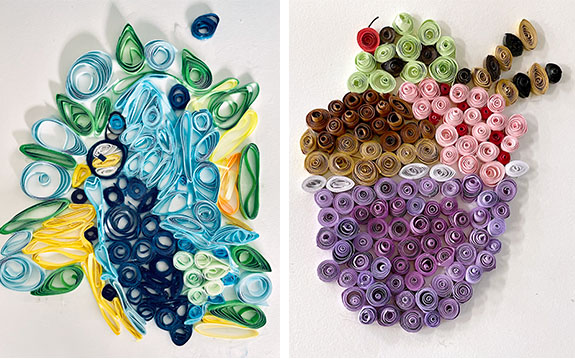
From simple household items to food, animals, and people, a variety of ideas flowed from every student based upon their interests.
As students worked, I advised them to take breaks and walk around the room to see what techniques their peers were using. I felt that this was a good opportunity for them to see how their classmates were facing and solving the same challenges, allowing them to work together and learn from one another. When students overcame obstacles and their designs started to evolve, I could see the gleam in their eyes as they saw their successful designs emerging.
Once they were finished, students shared their designs with two other classmates to get get feedback on final touches they could add to their designs.
Conclusion
This assignment allowed students to experiment with an art technique that most of them had never tried before. I’ve never heard my classroom so quiet as everyone focused on creating their delicate quilling designs. Many students continued to make designs at home, inspired by the new skill they had learned. It was great to engage and challenge them with something new and expose them to the beautiful process of “painting with paper.”
Leigh Drake is a visual arts educator at Old Donation School in Virginia Beach, Virginia, and a contributing editor for SchoolArts. Leigh.Drake@VBSchools.com
National Standard
Creating: Generate and conceptualize artistic ideas and work.
Art teachers use a process-based approach to engage students in art-making. Young students apply color-mixing to create vibrant watercolor paintings, elementary students are introduced to the unique process of paper quilling, middle-school students use critical thinking and ideation skills while drawing meaningful self-portraits, high-school students use fused glass techniques to create functional works of art, and more.